

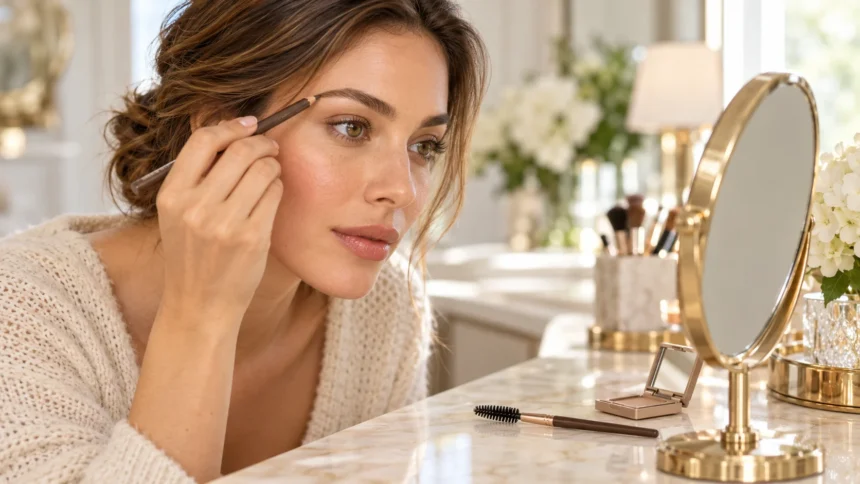
How to Fill in Eyebrows Naturally Without Making Them Look Drawn On
Learning how to fill in eyebrows naturally starts with enhancing the hairs you already have. The aim is to soften gaps, add gentle definition, and keep the brow’s texture visible. You do not need a perfectly outlined shape or a completely uniform color to make your eyebrows look neat and balanced.
Natural eyebrow makeup usually looks best when you apply less product at the beginning and build coverage gradually. A few carefully placed strokes can make a noticeable difference, especially around sparse sections. Filling every part equally often adds unnecessary darkness and hides the variation that makes real eyebrows look believable.
Start by looking at your brows in good lighting with your face relaxed. Notice where the hairs grow densely, where the skin shows through, and how the tail naturally ends. These observations help you place makeup where it is useful instead of drawing a new brow that needs constant blending and correction.
Choose the Right Eyebrow Product for Your Needs
A fine eyebrow pencil is useful when you want to fill small gaps or draw individual strokes. Its narrow tip gives you control over placement, particularly around the arch and tail. Choose a formula that releases color with light pressure so you can build definition without repeatedly pressing against your skin.
Brow powder works well when you prefer soft shading rather than clearly drawn strokes. Applied with a small angled brush, it can gently deepen sparse areas while keeping the overall finish diffused. Start with a small amount because a brush loaded with powder may deposit a dark patch that takes extra blending.
Tinted brow gel adds color to existing hairs and helps arrange them, making it useful for a quick routine. Clear gel provides hold without changing the shade, while pomade offers more concentrated definition. You do not need every product; choose one for filling and add a setting product only if it improves your result.
Match Your Brow Shade and Undertone Carefully
Choose an eyebrow shade that works with your natural brow hairs rather than matching your head hair automatically. Hair dye, highlights, and lighting can make those colors quite different. Test a small amount through a sparse section and check whether it blends into the surrounding hairs without creating an obvious warm or dark patch.
For dark brows, a softer brown or muted deep shade may provide enough definition without looking harsh. For lighter brows, a suitable taupe, blonde, or light brown can add visibility while preserving softness. These are starting points, so adjust according to the actual depth and undertone of your brows.
Undertone matters because two products with similar darkness can look very different on the face. A reddish brown may stand out against cooler brow hairs, while an overly gray shade may look dull against warmer ones. Check the result in daylight when possible and select the color that becomes least noticeable after blending.
Prepare Your Brows Before Applying Makeup
Begin with clean brows and make sure skincare around them has absorbed before adding makeup. A slippery layer can make pencil strokes move or cause powder to apply unevenly. You do not need to strip the skin of moisture; simply avoid applying brow product over visible residue from cream, sunscreen, or foundation.
Use a clean spoolie to brush your hairs into their usual direction. Lift the front gently, then guide the middle and tail outward according to their natural growth. This reveals gaps more clearly and prevents you from filling an area that looks sparse only because a few hairs are sitting out of place.
If you apply foundation first, check whether it has coated your eyebrow hairs and made them appear lighter. Carefully brush away excess before choosing how much color to add. A clean starting point makes it easier to assess the true shade and avoids building unnecessary product over makeup already caught between the hairs.
Follow Your Natural Shape Before Adding Definition
Look at the beginning, arch, and tail of each eyebrow before making any marks. Use the existing hair growth as your main guide, especially if you want an everyday finish. Small adjustments can improve balance, but drawing far beyond the natural outline usually requires more coverage and makes the makeup easier to notice.
You can use a slim brush as a visual reference for possible starting and ending points. However, standard brow-mapping lines are only guides because facial proportions and eye spacing vary. Keep any planned adjustment close to your existing shape and check your whole face before deciding whether it actually improves the result.
Avoid tracing a solid border around the entire brow as your first step. A dark outline can remain visible even after you fill the center, particularly along the upper edge. Instead, identify the sections that need help and add gentle definition there, allowing the surrounding hairs to provide most of the shape.
Fill Sparse Areas With Short, Light Strokes
With a pencil, use short strokes that resemble the length and direction of nearby hairs. Keep your pressure light and leave small spaces between marks rather than coloring the skin continuously. Working this way lets the makeup blend into the brow instead of forming a flat strip of color above your eyes.
Begin in the middle or near the tail if those areas need more coverage, then move toward other gaps. Starting away from the front reduces the chance of depositing your darkest marks where they are most visible. Add only a few strokes at a time so you can judge the effect before building another layer.
For a larger sparse section, gradually connect the filled area with the surrounding brow rather than drawing one heavy line through it. Vary the stroke lengths slightly while staying consistent with natural growth. If the product starts looking dense, pause and blend before adding more, since additional marks may make the patch harder to soften.
Keep the Front of Your Eyebrows Soft
The inner brow usually benefits from a lighter touch because a sharply squared front can make the entire brow look heavily drawn. Brush the hairs upward gently and assess whether they need any filling at all. If the area already has enough density, blending leftover product through it may provide sufficient definition.
When filling is needed, add a few fine strokes in the same direction as the front hairs. Avoid creating a straight vertical boundary or placing several dark marks close together. The transition from bare skin to brow should remain gradual, allowing some skin and individual hairs to show through near the beginning.
Step back from the mirror to see whether the two brow fronts have similar visual weight. One may naturally start slightly higher or contain fewer hairs, which does not require a complete redraw. Adjust the lighter side with a small amount of product instead of making both fronts darker to force an exact match.
Define the Arch and Tail Without Overextending Them
Add definition around the arch by following the natural change in direction of your brow hairs. A few strokes along a sparse section can make the shape clearer without raising the peak dramatically. Keep the upper edge soft, especially if your natural arch is low and you want the finished brows to remain understated.
The tail often needs slightly more precision because its hairs may be finer or less dense. Use a sharpened pencil or the narrow edge of an angled brush to create a gentle taper. Build the endpoint gradually rather than drawing a thick line that suddenly ends or extends noticeably beyond your existing brow.
Check the tail with your face relaxed and your head held straight. A long downward extension can change the overall expression, while an unusually short endpoint may look disconnected from the rest. Use your natural growth and preferred shape as guides, then compare both sides at a normal viewing distance before adding more length.
Use Brow Powder for Soft, Even Shading
If you use powder, pick up a small amount with an angled brush and tap off the excess before application. Place the color through sparse sections using short, controlled movements. Keep the brush within the natural brow area and avoid sweeping a heavily loaded brush from the front all the way to the tail.
Build slightly more definition through the middle and outer portion if needed, leaving the inner section softer. Powder is useful for creating a gentle background behind existing hairs rather than imitating every individual strand. A light layer can improve fullness while still allowing variation in density and texture to remain visible.
For especially fine gaps, you can combine powder with a few pencil strokes instead of adding several layers of shading. Use the powder for softness and the pencil only where more precise detail helps. Keep the combination minimal, since using multiple products does not automatically produce a more natural or longer-lasting finish.
Blend and Set Your Brows Without Flattening the Texture
After filling, brush through your eyebrows with a clean spoolie using gentle movements. Blend in the direction of hair growth rather than scrubbing back and forth across the skin. This softens obvious marks, distributes some color, and helps you see whether the filled sections still look heavier than the surrounding natural hairs.
Apply a small amount of clear or tinted gel if you want to keep the hairs in place. Follow the product instructions and remove excess from the applicator when needed. Too much gel can create visible residue or make hairs stick together, which may reduce the soft texture you worked to preserve.
Choose a hair arrangement that looks comfortable rather than forcing every strand straight upward. A gentle lift at the front with the remaining hairs directed outward often creates an easy everyday finish. Let the gel set without repeatedly touching the brows, then check for clumps or stray product around the edges.
Correct Common Eyebrow Makeup Mistakes
If your brows look too dark, brush through them before reaching for another product. For a concentrated patch, gently lift excess color with a clean tool or carefully clean the section and refill it more lightly. Adding concealer around a dark brow will sharpen its edges but will not reduce the darkness inside.
If your brows look blocky, soften the front and break up any continuous outline that remains visible. Replace heavy coverage with fewer strokes during your next attempt, especially around areas that already have dense growth. Natural-looking brows depend on selective filling, so every part does not need the same amount of makeup.
If one brow looks fuller, compare the overall effect instead of focusing on individual hairs. Fill a few gaps on the lighter side and blend the stronger side if necessary. Avoid repeatedly extending both outlines to chase symmetry, since this can turn a small difference into two brows that look much larger than intended.
Conclusion
Filling in eyebrows naturally is easier when you work with your existing shape and apply color only where it helps. Choose a suitable shade, brush the hairs into position, and use light strokes or soft powder shading. Keeping some skin and texture visible makes the result look more believable than completely uniform coverage.
Pay particular attention to the brow front, arch, and tail because each area needs a slightly different touch. The front usually looks softer with minimal product, while sparse sections near the tail may need more precise definition. Blending between stages gives you better control and helps prevent a small adjustment from becoming excessive.
A simple routine can be enough for polished everyday brows without taking much time. Practice with one filling product, check your work in good lighting, and add gel only when you want extra hold. The most natural finish is one that supports your features while still looking like your own eyebrows.
FAQs
What Is the Easiest Way to Fill in Eyebrows Naturally?
Brush your brows into place, then use a fine pencil to add short strokes only through sparse sections. Blend with a spoolie and keep the front softer than the middle and tail.
Is Eyebrow Pencil or Powder Better for a Natural Look?
Both can look natural. Pencil offers precision for individual strokes and small gaps, while powder creates soft shading. Choose according to your brow density, the areas you want to fill, and your preferred technique.
Should My Eyebrow Product Match My Hair Color?
Match the product primarily to your natural eyebrow hairs, considering their depth and undertone. Your head hair may differ because of dye or highlights, so test the shade directly through your brows.
How Do I Stop My Eyebrows From Looking Too Dark?
Use light pressure, apply less product, and fill only the gaps. Blend before adding another layer, and avoid coloring the entire brow equally or creating a heavy outline around its edges.
Can I Fill in My Eyebrows Without Brow Gel?
Yes, brow gel is optional. A pencil or powder can provide enough definition on its own; add gel only if you want to arrange the hairs, introduce a little tint, or improve hold.