

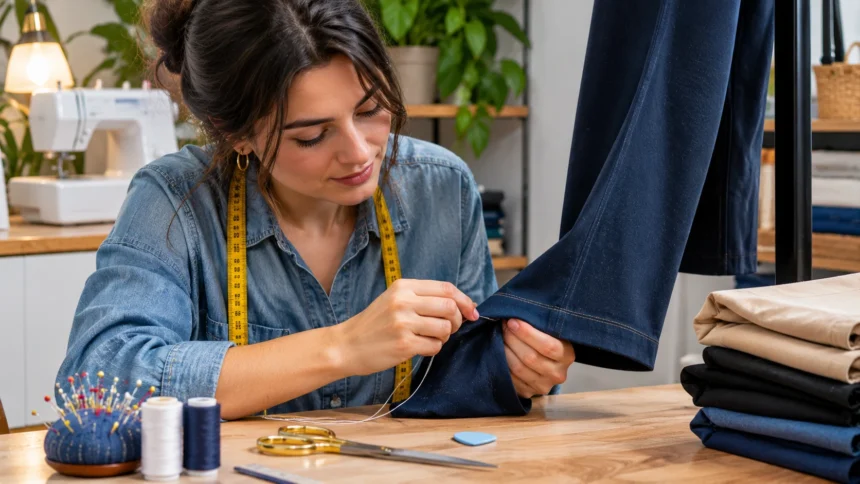
Finding the perfect pair of pants can be challenging, especially when the waist fits comfortably but the legs are too long. Instead of replacing your favorite trousers or paying for every small alteration, learning how to hem pants can help you adjust their length at home. With a few basic sewing supplies and simple techniques, you can create a neat finish that complements your preferred style.
Hemming pants involves shortening the fabric and securing a new finished edge. You can use a sewing machine, hand stitching, or suitable no-sew methods depending on the fabric and garment design. Whether you want to adjust jeans, dress pants, or casual trousers, this guide explains practical hemming techniques, common mistakes, and easy styling tips.
How to Hem Pants: A Beginner-Friendly Guide
Hemming pants is the process of adjusting their length by folding, trimming when appropriate, and securing the lower fabric edge. The goal is to achieve a comfortable and even finish that matches the intended garment style. Pants can be hemmed using several methods. Choosing the right technique depends on the fabric, available tools, and desired appearance.
Before starting, put on the pants with the shoes you expect to wear most often. This helps you determine where the finished hem should fall. Some styles look better near the ankle, while others are designed to extend over footwear. Marking the preferred length carefully prevents unnecessary cutting and uneven results.
Beginners should start with simple trousers made from easy-to-handle fabric. Lightweight cotton or basic woven materials can be easier to work with than slippery or stretchy textiles. Take your time measuring and pressing each fold. A careful approach usually produces better results than rushing through the alteration.
Essential Tools You Need to Hem Pants
The tools required for hemming depend on whether you plan to sew by hand, use a sewing machine, or apply a no-sew method. Basic supplies include a measuring tape, fabric scissors, pins or sewing clips, and a marking tool. An iron is also useful for creating clean folds. These materials help improve accuracy and consistency.
For hand sewing, choose a suitable needle and thread that coordinates with the garment. Machine hemming requires a sewing machine with an appropriate needle and stitch setting. Heavier fabrics such as denim may need specialized needles. Always follow the equipment manufacturer’s instructions when selecting accessories.
A seam ripper can be helpful when removing an existing hem or correcting stitching mistakes. A ruler or hem gauge also makes repeated measurements easier. Keep sharp tools organized and use them on a stable work surface. Having everything prepared before starting reduces interruptions during the project.
How to Measure Pants Before Hemming
Accurate measuring is one of the most important steps in hemming pants successfully. Begin by wearing the trousers and checking their length in front of a full-length mirror. Stand naturally and avoid pulling the fabric upward or downward. Mark the desired finished position using removable fabric chalk or suitable pins.
Next, remove the pants and place them on a flat surface. Measure from the marked position to the existing hem to understand how much length needs adjustment. Check both legs because their original lengths may differ slightly. Consistent measurements help create a balanced result.
Remember that the finished hemline and cutting line are not necessarily the same. Most sewn hems require additional fabric for folding and securing the edge. The amount depends on the chosen method and garment construction. Mark these lines separately to avoid cutting away fabric needed for the new hem.
How to Hem Pants by Hand
Hand hemming is a useful option when you do not have access to a sewing machine. It works particularly well for small alterations and garments requiring discreet stitching. Start by marking the desired length and preparing an appropriate folded hem. Press the fold gently according to the fabric’s care instructions.
Choose thread that closely matches the trousers and thread a suitable hand-sewing needle. Use small, consistent stitches to secure the folded fabric while catching only a little material from the outer layer when a discreet finish is desired. Avoid pulling the thread too tightly. Excessive tension can create visible puckering.
Continue stitching around the leg opening until the folded edge is secure. Finish the thread carefully and inspect the hem for uneven areas. Repeat the process on the second leg. Hand hemming requires patience, but it can produce a neat finish without specialized sewing equipment.
How to Hem Pants With a Sewing Machine
A sewing machine can make hemming faster and provide consistent stitching on suitable fabrics. Begin by measuring the desired length and preparing the folded hem. Pressing the fabric before sewing helps maintain a straight edge. Use sewing clips or pins to keep the fold in position.
Select an appropriate stitch and needle based on the fabric type. A straight stitch works for many woven trousers, while stretchy materials may require a compatible stretch stitch. Test the settings on a fabric scrap when possible. This helps identify problems with thread tension or stitch appearance before sewing the garment.
Guide the fabric steadily through the machine without pulling it. Remove pins before they reach the needle and keep fingers away from moving machine parts. Once the hem is complete, inspect the stitching and press the fabric if appropriate. Repeat the process for the other leg.
How to Hem Pants Without Sewing
No-sew hemming methods are convenient for people who prefer not to use needles or sewing machines. Fusible hemming tape is one common option for suitable fabrics. The tape bonds layers of material when activated using heat according to the product instructions. It can provide a clean appearance for certain casual garments.
Start by marking the desired length and preparing the hem fold. Place suitable fusible tape between the fabric layers, following the manufacturer’s directions. Use the recommended iron temperature and pressing method. Avoid overheating delicate fabrics or applying heat to materials that cannot tolerate it.
No-sew hemming is not ideal for every garment. Heavy fabrics, stretchy materials, and clothing requiring frequent washing may need a more durable method. Some adhesive products can also leave residue or affect fabric texture. Test compatibility before using hemming tape on valuable clothing.
How to Hem Jeans While Keeping the Original Hem
Jeans often feature distinctive stitching and a finished edge that contributes to their original appearance. When shortening denim, some people prefer preserving this factory hem rather than creating an entirely new one. This technique can help maintain the familiar look of casual jeans. However, it requires careful measuring.
The original hem method involves adjusting the excess length while retaining the existing finished edge. The exact construction depends on the jeans and the amount of shortening required. Carefully align the original hem with the intended new position before securing it. Thick denim seams may require suitable sewing equipment.
After stitching, excess fabric may be managed according to the chosen technique. Pressing helps the retained hem sit neatly against the trouser leg. Check both sides to ensure the adjustment appears consistent. This method can be particularly useful for jeans with decorative or heavily washed hems.
How to Hem Dress Pants for a Professional Finish
Dress pants often require a more discreet hem than casual trousers or jeans. Their fabric may be lightweight, smooth, or structured, making visible stitching less desirable. A blind hem or carefully completed hand stitch can create a polished appearance. The best approach depends on the material and garment design.
Before altering dress pants, check whether they have a plain hem, cuff, or other special detail. Formal trousers may also be designed with a particular amount of fabric resting over the shoes. This feature is sometimes called the trouser break. Consider the intended style when selecting the finished length.
Pressing is especially important when hemming formal trousers. Use the appropriate iron setting and a pressing cloth when recommended. Avoid creating unwanted shiny marks on delicate fabrics. Taking time to preserve the garment’s original construction helps achieve a clean professional finish.
How to Hem Wide-Leg and Straight-Leg Pants
Wide-leg pants often have larger leg openings, which can make hemming slightly different from adjusting narrow trousers. The wider fabric requires careful alignment to maintain an even edge. Measuring while wearing the pants is particularly important because the hem may fall differently across the footwear. Choose a length that matches your preferred style.
Straight-leg trousers usually offer a relatively consistent width from the knee toward the hem. This can make folding and stitching more straightforward. However, fabric thickness and construction still affect the process. Keep the folded edge even and avoid stretching the material while sewing.
For both styles, check that the pants hang naturally after the adjustment. An uneven fold can change how the leg opening appears. Press the hem appropriately and inspect it while the garment is worn. Small corrections made before final stitching can improve the overall result.
How to Hem Pants With a Cuff
Cuffed trousers feature a folded band at the bottom of each leg, creating a distinctive finished appearance. This detail is commonly associated with certain tailored and casual styles. Hemming cuffed pants requires preserving or recreating the folded structure. The process may involve more fabric than a basic plain hem.
Begin by examining the original cuff and recording its width. Determine the preferred finished length before removing or adjusting the existing construction. Depending on the garment, the cuff may need to be unfolded and rebuilt. Careful measurements help maintain matching cuffs on both legs.
Cuffs can add visual structure to trousers, but they are not suitable for every garment. Some lightweight or very narrow designs may look better with a simple hem. Personal preference and garment construction should guide the choice. Preserving consistent cuff dimensions creates a more intentional finish.
How to Hem Stretchy Pants and Leggings
Stretch fabrics require special attention because they expand and recover during movement. A regular straight stitch may break when the fabric stretches beyond the thread’s flexibility. For this reason, knit garments often require a stretch-compatible stitch or suitable machine setup. Testing the method before altering the garment can prevent mistakes.
When measuring leggings or stretchy trousers, avoid pulling the material tightly. Allow the garment to rest naturally and mark the desired length. Use appropriate clips or pins to hold the fold without distorting the fabric. A narrow hem may work better than a bulky folded edge.
Some stretchy garments are finished using coverstitch machines or other specialized techniques. Recreating the original finish may require equipment not available in every household. A compatible stretch stitch can provide an alternative for certain projects. Follow fabric care instructions and avoid excessive heat during pressing.
How Much Fabric Should You Leave for a Hem?
The amount of fabric needed for a hem depends on the garment and finishing technique. A simple narrow hem may require less fabric than a deep trouser hem or folded cuff. Different sewing patterns also provide specific allowances. Following the intended construction method helps produce more predictable results.
For many basic woven trousers, a hem allowance of approximately one to two inches may be useful, depending on the chosen finish. However, this is only a general example rather than a universal requirement. Stretch fabrics and special designs may need different allowances. Always confirm the fold width before cutting.
Leaving sufficient fabric also provides flexibility for small adjustments. Cutting too close to the finished hemline can make correcting mistakes difficult. When uncertain, begin with a temporary fold and check the appearance. Once the length is confirmed, trim only the material that is no longer required.
Common Mistakes to Avoid When Hemming Pants
One frequent mistake is cutting the trousers before confirming the finished length. Once fabric has been removed, restoring the original length can be difficult. Always measure carefully and try the pants on with the temporary fold. This simple step can prevent unnecessary alterations.
Another common problem involves creating uneven hems between the two legs. Measurements may differ when fabric shifts or the trousers are not positioned correctly. Check each leg separately and compare the finished results. Using a ruler or hem gauge can improve consistency.
Incorrect sewing settings can also affect the appearance and durability of a hem. Heavy denim, delicate fabrics, and stretchy materials may require different needles or stitches. Avoid forcing unsuitable fabric through a sewing machine. Testing the technique and following equipment instructions can help prevent damage.
How to Choose the Right Pant Length for Your Style
The ideal pant length depends on the garment’s design, footwear, and personal preferences. Cropped trousers may finish above the ankle, while full-length styles can extend toward the shoes. Different lengths create different visual effects. Choosing a comfortable finish is more important than following a rigid fashion rule.
Wide-leg pants often look distinctive when their length complements the intended flowing shape. Straight-leg trousers can work with several hem positions, depending on styling preferences. Formal pants may use a slight break over the footwear. Experimenting with temporary folds can help identify a suitable length before sewing.
Consider how you plan to wear the pants during everyday activities. A length that works with flat shoes may feel different when paired with boots or other footwear. Try the trousers with your most frequently worn shoes. This approach helps create a practical wardrobe that supports comfortable movement.
Easy Styling Tips for Newly Hemmed Pants
Once your pants are hemmed, they can be styled in several ways to create fresh outfits. Cropped trousers may pair well with casual sneakers, loafers, or simple sandals. Full-length jeans can complement boots and everyday footwear. The finished hem becomes part of the garment’s overall appearance.
Color combinations can also refresh familiar trousers. Neutral pants provide flexibility when paired with colorful shirts, sweaters, or lightweight jackets. Denim works with both casual and slightly more structured pieces. Experimenting with different tops allows you to create varied outfits using existing clothing.
Accessories and layering provide additional styling opportunities. A simple belt, comfortable jacket, or coordinated bag can change the appearance of an outfit. The goal is to create combinations that reflect your preferences. Properly hemmed pants can make favorite garments easier to wear across different occasions.
How to Care for Pants After Hemming
Proper garment care can help preserve a newly completed hem. Follow the clothing label’s washing and drying instructions because heat and moisture can affect some fabrics. Certain materials may shrink slightly after washing. This is one reason prewashing new fabric can be useful before alterations.
Check the stitching occasionally, particularly on frequently worn trousers. Loose threads or damaged seams should be repaired before the hem becomes completely undone. No-sew adhesive hems may also require special care depending on the product. Following the manufacturer’s recommendations can improve durability.
Store pants in a way that reduces unnecessary creasing or fabric distortion. Hanging certain trousers may help maintain their shape, while others can be folded comfortably. Press hems when appropriate using suitable temperature settings. Simple maintenance helps preserve the appearance of altered clothing.
Conclusion
Learning how to hem pants is a practical clothing skill that can make everyday garments more comfortable and convenient to wear. Whether you choose hand sewing, machine stitching, or a no-sew method, accurate measuring is essential. Different fabrics and styles require different approaches. Understanding these differences helps create cleaner and more reliable results.
Before altering trousers, consider their original construction, intended length, and preferred footwear. Jeans, dress pants, wide-leg trousers, and stretchy garments may require different techniques. Taking time to prepare the fabric and test the finish can reduce mistakes. Appropriate tools and careful stitching also improve the final appearance.
Ultimately, hemming pants allows you to adjust clothing to your personal style without replacing garments unnecessarily. Small alterations can make favorite pieces easier to wear and combine with different outfits. Start with simple projects and gradually explore more advanced techniques. With practice, hemming can become a useful part of maintaining a comfortable and versatile wardrobe.
Frequently Asked Questions (FAQs)
What is the easiest way to hem pants at home?
Using fusible hemming tape is one of the simplest no-sew options for suitable fabrics. However, hand stitching or machine sewing may provide a more durable finish, depending on the garment.
Can you hem pants without a sewing machine?
Yes, pants can be hemmed by hand using a needle and thread. Some fabrics also work with fusible hemming tape. Choose a method that suits the material and intended durability.
How much fabric should I leave when hemming pants?
The required allowance depends on the garment and hemming method. Many basic woven trousers use approximately one to two inches, but special cuffs and fabric types may require different amounts.
How do you hem jeans without losing the original hem?
An original-hem technique preserves the factory-finished edge while adjusting the leg length. The method involves careful measuring, repositioning the existing hem, and securing the altered fabric with suitable stitching.
Should pants be washed before hemming?
Washing according to the care label before hemming can be useful, particularly when fabric may shrink. This helps reduce the chance that the finished length changes after the garment’s first wash.